Some tend to shy away from messier art projects as it can definitely be a challenge to control… BUT the summer months are perfect to take the leap and try some of these as we can go outside and be as messy as we want!
Allowing children to explore new materials and get physical with their art mediums is great for creativity, fine motor skills, self confidence and is also lots of fun!
Here are a few of our favourites this summer – let us know how if you enjoyed them and how it felt to get out of the no-mess comfort zone! 😉
Plaster-of-Paris Donuts
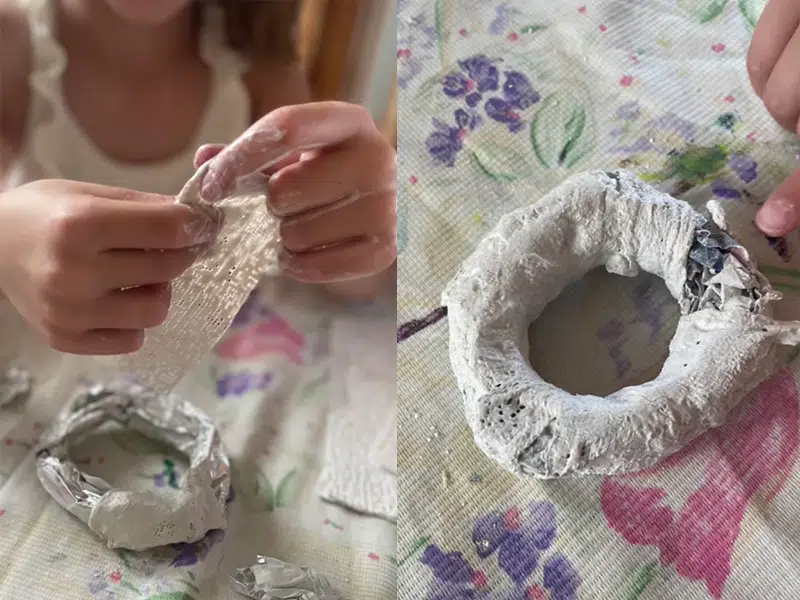
We had so much fun on holiday this year making Plaster-of-Paris donuts with our friends! This project is inspired by the hamburger sculpture project and the Claes Oldenburg examples from our Delicious Delights box.
• Using old newspaper and foil, create the loose shape of a donut – a ring with a hole in it! Use tape if needed to make it secure.
• Cut a roll of Plaster-of-Paris into strips about the length of your hand. Fill a bowl with water. Dip each strip in the water, massage out the holes in the strip, and then drip off any extra water before molding the strips around your shape. Continue until you have covered the whole donut!
• Leave it to dry in the sun until it’s as hard as a rock!
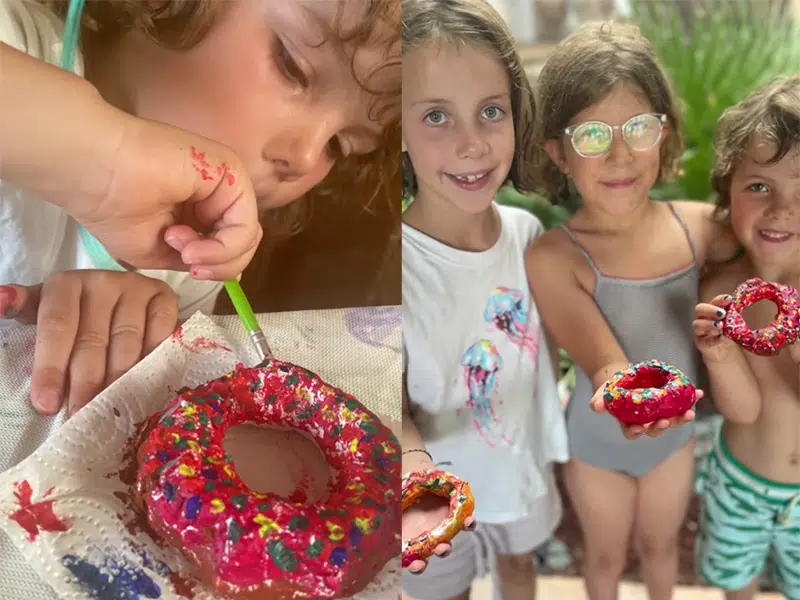
• Use acrylic paints and/or oil pastels (or any paints you have at home) to colour your donut. You can add glitter, sequins, confetti or beads to add extra toppings and decorations!
Glue Batik
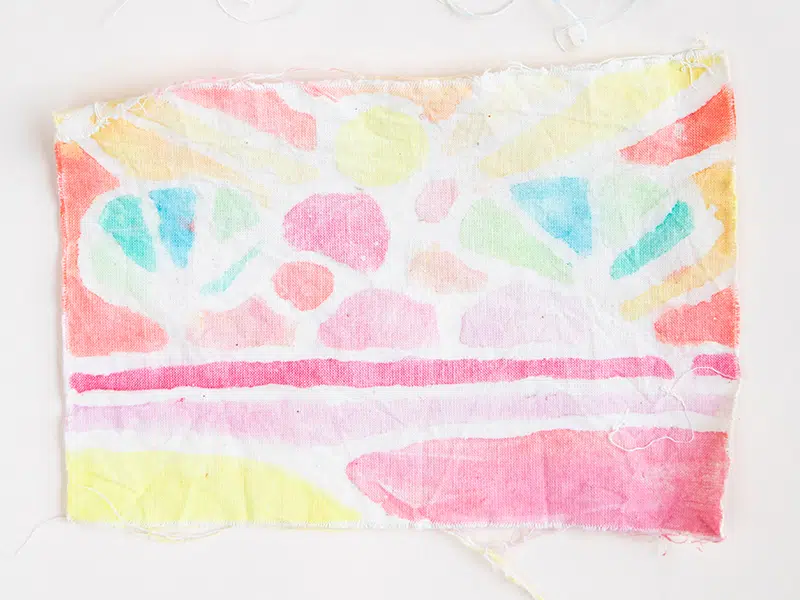
This is a great project to do outside when the weather is warm, and we loved doing this with our grandparents this summer! It is one of the great projects in our Fabulous Fabric box and is inspired by the work of Carolyn Gavin.
• Look at a picture that inspires you or at a real scene outside your window. On a piece of paper, sketch out a design inspired by what you’ve seen, and then follow the lines with a black marker.
• Place a piece of cotton fabric (for example, an old pillowcase) on top of your sketch and trace your drawing onto the fabric in pencil.
• Now CAREFULLY follow the pencil lines with PVA glue – try to keep your hand steady and the thickness of your line uniform.
• When your glue is completely dry, use paints (acrylic or gouache would work well) to paint in all the sections between the glue lines.
• When your paint is dry, it’s time to wash out the glue – this can be messy! Place the painted batik in a tub of warm/hot water. Let the fabric soak for about an hour. (Don’t worry, some of the paint colour will come out, creating a more pastel look.) Then gently scrub the glue and excess paint off with a soft brush (an old toothbrush may work). Be gentle and patient! (You may also like the look of the glue, and not want to remove it completely. But that is up to you!)
• Once completely dry, an adult can run an iron over the fabric (painted side facing down) to set the colour one more time and to smooth out any wrinkles.
Sea-Textured Painting
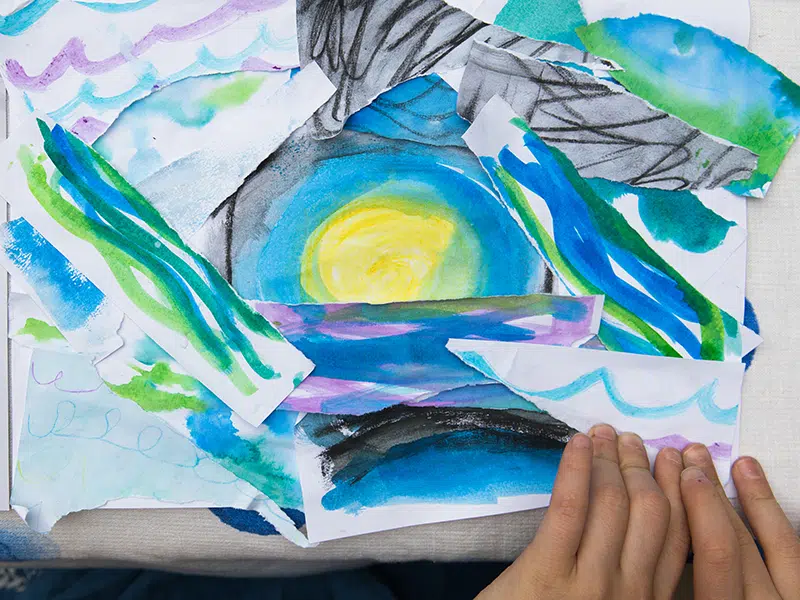
Creating textured papers is one of our all time favourite process-art projects. Creating textured papers really has no end, and no rules to what you can do. Here are some ideas to start with… We used these papers to create the Turner-inspired stormy sea collage project from our Noble Nature box.
• Why not think of mixing in ingredients from home to change the texture of your paint? Flour, salt and rice all work really well! You can either mix these into the paint, or sprinkle them on top of wet paint!
• Experimenting with powder paint is also lots of fun as you can change the consistency and colour you create depending on how much water you add to the paint. We love Earth Paints, and these can be found in our What a Wonderful World box.
• Instead of a paintbrush, why not try painting with your fingers, a kitchen sponge, a ball of rolled-up foil, a wet-wipe, an old credit card, or even a toy car..?? Using different art tools too can be fun – for example, pipettes, paintbrushes of different sizes and widths, sponge dabbers and forks?
• Mixing art materials can create interesting textures. Try oil pastels with water-colour paints on top, or chalk pastels with felt-tip pens. We also love to mix collage with acrylic paints, or inks with crayons!
• TIP – cut your sheets of A4 paper into 4 so that you can create lots of little painted textured papers to use later.
Potato-print Animals
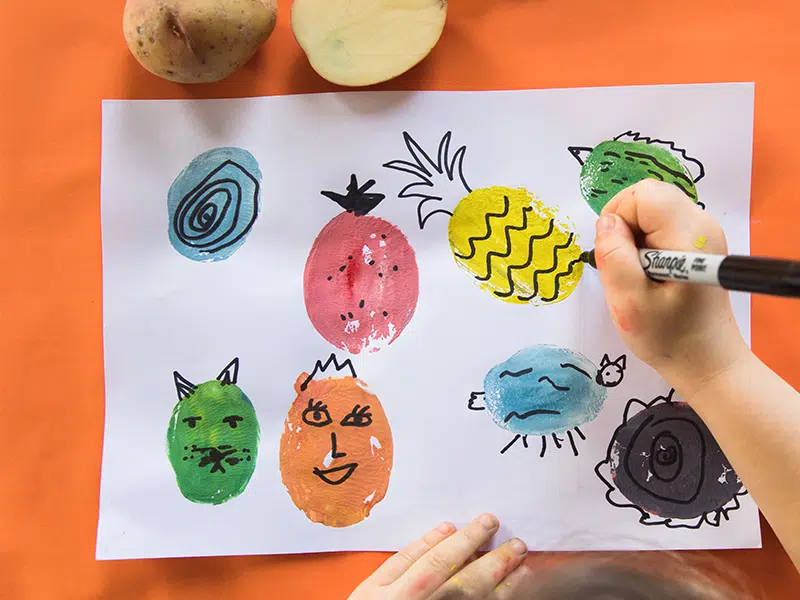
There is nothing as satisfying as a good potato print! This is a great project for the whole family and, in our case, became a silly game about who could come up with the most interesting animal! We used our printed fabric to make a tablecloth, but you could print on paper, a tote bag, a T-shirt, a book cover or whatever else tickles your fancy! If printing animals is of interest to you, there is a great styrofoam printing project in our Awesome Animals box.
• Choose the material you will be printing on and lay it flat on a clean surface.
• Cut a variety of different shaped potatoes in two and pat them dry to remove any excess water.
• Put some acrylic paint onto a palette (this could be as simple as an old piece of cardboard). Maybe choose your colours according to the animals you would like to make?
• Start printing your painted potatoes over your surface leaving space around each print to draw on your animals.
• Leave to dry.
• Now with a black marker, add on legs, heads, beaks, ears and so on to make either real or imagined animals of your own!
Back to the main news page