As the summer holidays continue, here are a few activities to do at home celebrating the last few days of July – the month our Marvellous Music box was released.
Spin Drums
Materials:
• Empty ribbon spools
• Paper straws
• Card
• Washi tape
• Ribbon or twine
• Wooden beads
• Hot-glue gun or craft glue
Draw around your ribbon spool on some card, so you end up with two circles.
Have your child decorate the circles with Washi tape.

Cut out the circles and put aside to glue on to the spool later.
Make a hole on the bottom of the spool (this is where the paper straw handle will go).
Next, make a hole on both sides of the spool (this is where the beads will be attached).
Slide the paper straw into the bottom hole.
Measure and cut two pieces of ribbon (or twine) the width of your spool.
Push one ribbon through a hole in the side of the spool. Tie a knot in the end of the ribbon and, using a hot-glue gun or craft glue, affix the knot to the hole on the spool so that it won’t go through the hole. Repeat for the other side.
Ask your child to choose two beads each. Help them thread the beads through the ribbon/twine. Tie the beads with a secure knot to the end of the ribbon.

Help them glue the decorated circles onto the ribbon spools.
Ta da! Roll the straw handle in between your fingers and as it twists the beads should strike each side of your ‘drum’!
Tambourine
Materials:
• Paper plate
• Crayons, stickers, markers, etc.
• String/ribbon
• Small bells (can be found on Amazon)
• Hole punch or pencil
• Scissors

Decorate the back of a paper plate. We used paint sticks and pencils with a Little One, aged 3, but you can use crayons, stickers, markers or paints! Go wild!
Cut sections of string about 8cm. We attached 7 bells so we needed 7 sections of string, but you can do as many or as little as you please! The more you have the louder your bells will jingling!
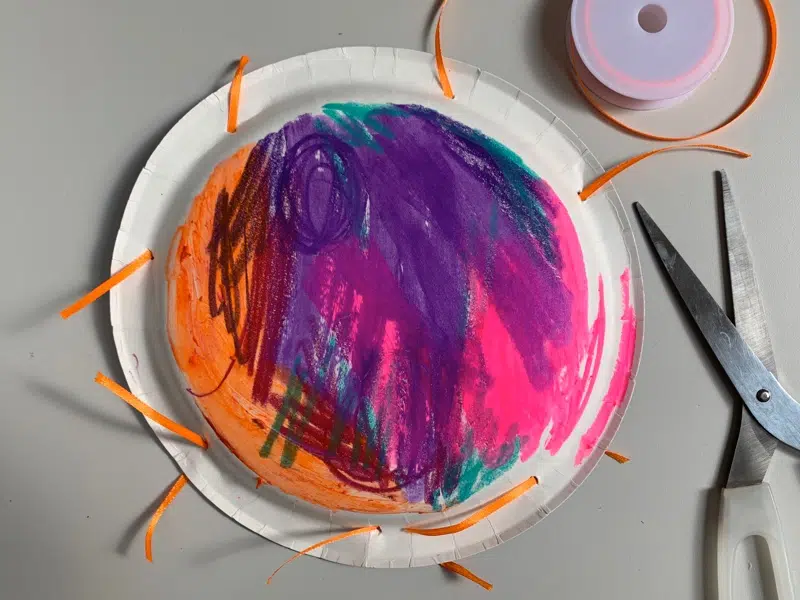
Use either a hole punch or a pencil to poke holes around the edge of the plate. We made 7 holes for our 7 bells, but make as many as you need for the string and number of bells you have. TIP: Don’t make holes too close to the edge or your bells will rip through.
Tie each bell to the plate with a secure knot and cut off any excess string.
Ta-da! Your tambourine is ready to shake!
Straw flute
Materials:
• 8 or more straws
• Tape
• Scissors

Divide your straws into sets of two. We had 8 straws, so made 4 sets of two straws.
Take a pair of scissors and cut each set of two straws slightly shorter than the previous set
Cut a long strip of tape, put the straws on the sticky side, arranging them in twos from the shortest to the longest.
Put a hand on the straws to secure them and wrap the tape around to hold the straws together.
Then wrap a strip of tape around each group of straws to secure them all the way along
Blow into them like a flute!
