Five ways to be creative with kids at home
Butterfly wings with pressed flowers
You will need: Sticky-backed paper, pencil, baking paper, fresh flowers and leaves, a stick or piece of cardboard, elastic.
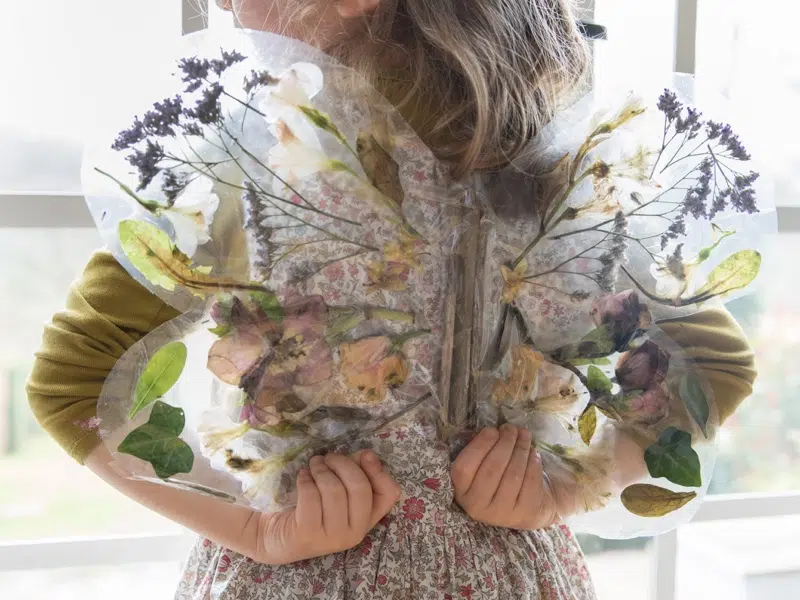
Pick some of your favourite flowers! Choose at least two of each. Place these under heavy books or in a flower press.
Take a big piece of baking paper and fold it in half – the fold is going to be the middle of the butterfly. Open the paper up, draw one wing with a permanent marker, fold the paper again and draw the second wing by tracing over the lines of the first. Tape onto your table surface four corners of the baking paper. On top of this, tape down the edges of a piece of contact paper, sticky side UP.
Stick on your flowers, think of pattern and symmetry. TIP Don’t place flowers close to the edge.
When you’re done decorating, place another piece of contact paper on top of the first one, but sticky side DOWN. Cut around your butterfly shape.
Use a stick, or a piece of cardboard to add the butterfly body. An adult can hot-glue the body onto the middle of the wings. Then cut two pieces of elastic for the straps (measure them around your child’s arms first) and glue the ends to the top and bottom of the body.
Stone (lady) bugs
You will need: stones, red and black or coloured tissue paper, scissors, paintbrushes, PVA glue.

Draw a bug’s head and bug pattern on your stone in pencil
Tear up your tissue paper into small shreds.
Using your pencil drawing as a guide, place the coloured tissue paper on the stone and paint over it with PVA glue.
Layer your tissue paper over the stone until you are satisfied with the colours and design.
Make antennae by twisting tissue paper between your fingers, then smoothing PVA glue all over them. Use the wooden end of your paintbrush to press them down onto the rock and let them dry slightly so that they stick.
Allow the bug to dry completely, then paint two white circles for eyes, with black circles inside for the pupils.
Recycled plastic flowers
You will need: plastic cups of different sizes, colourful Sharpie pens, foil or greaseproof paper, wire or pipe cleaners, glue or a hot-glue gun.

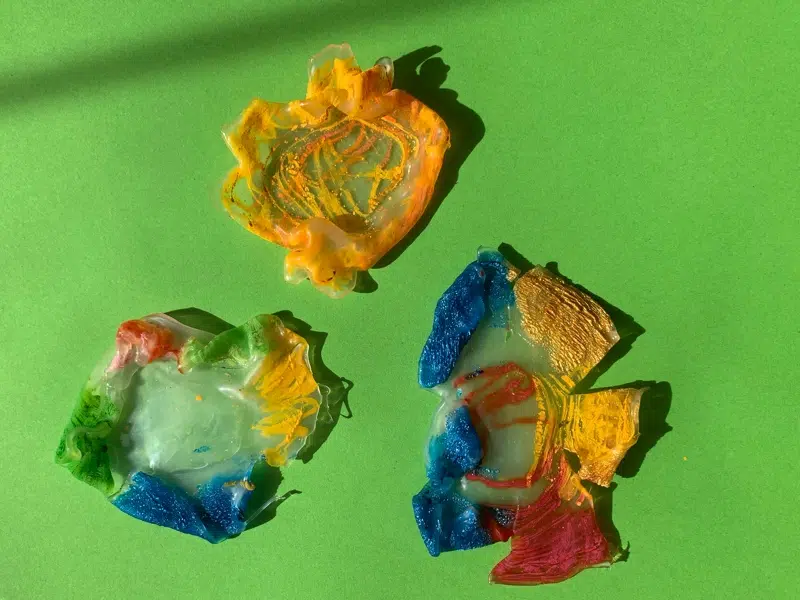
Collect a few clear plastic cups of different sizes. Colour them completely with your colourful Sharpies.
Cut out small slits into the sides of your cups.
Place on foil or greaseproof paper and put in the oven to melt.
Take out and leave to cool completely. Then with either a glue gun or PVA glue, stick the different-sized melted cups together to create a layered flower! You can also add on a stem with either a pipe cleaner or wire.
Chalk pavement rainbows
You will need: colourful chalk, a pavement or a slab of stone outdoors.

It’s so nice to draw a rainbow outside your front door.
Use your chalks to draw and colour in a huge rainbow on the floor!
It may then rain (this IS Britain after all! ;)), and it will be lots of fun to watch the colours melt into each other and wash away! Why not put on your wellies and stomp in the colourful puddles..?
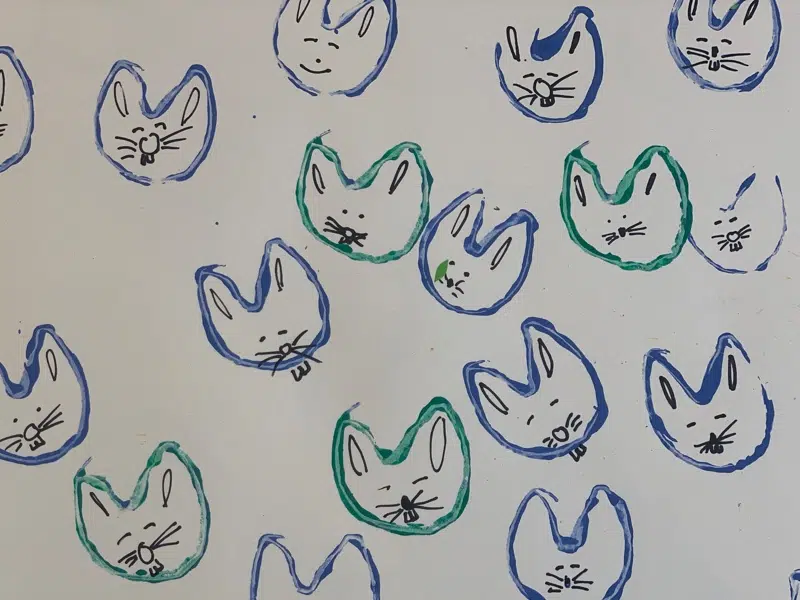
Toilet-paper-roll bunny prints
You will need: 2 old toilet rolls, paint, paper.
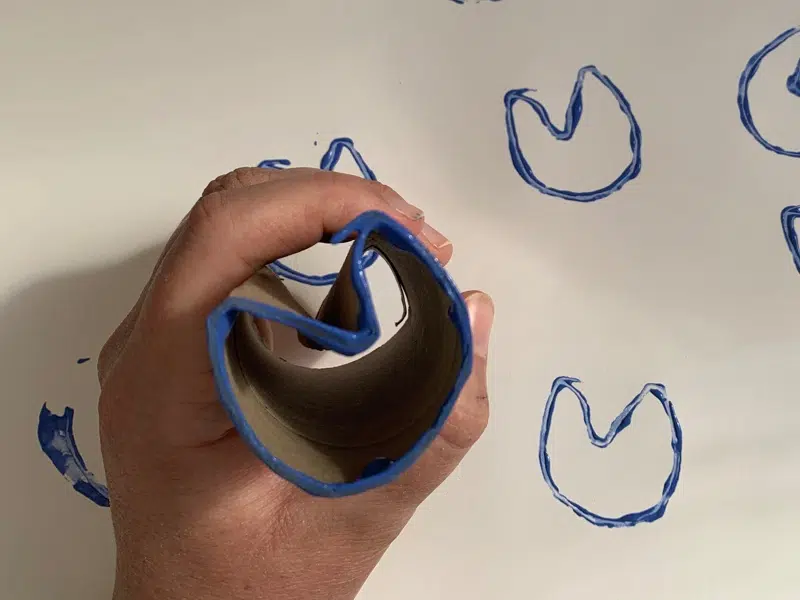
Take a toilet roll and squeeze it into two bunny’s ears.
Pour some paint into a paper plate, onto a palette or simply old piece of cardboard. Dip your toilet roll in paint to print the bunny’s head.
With felt-tip markers, draw on two eyes, a nose and some bunny whiskers!
If you want, use your fingers to paint on some green grass for your bunnies to hop in!
Back to the main news page